26 Apr 2010
by chefashley
in Chocolate Chips, Egg, Waffles
Tags: Chocolate Chip Waffles, Chocolate Chips, Waffles, Yummy
So I have been a little behind on some recipes that I’ve wanted to post as I have been going to job interviews like CRAZY! In the past two months I have been to many, many interviews, been offered MANY positions, and finally went to a second interview and signed a contract with a Real Estate company this morning. So now I am an Administrative Assistant on the weekends (providing over 30 hours) and am free to pick up a part time job to fill in the blanks during the weekdays Mon-Thurs. I am very excited! I have been looking for an opportunity like this ever since I moved to Mississauga and I have finally secured it. The only issue is that I now have to terminate my employment at the other Real Estate Office I work at due to a conflict of interest 😦 This is upsetting for me because I am very fond of the girls in that office and it was my first real connection to the Real Estate world. But, c’est la vie…when opportunities arise they must be seized. I’m not one to accept change readily but am doing my best to go with the flow these days! 😀 I feel GREAT. Who wants to be stuck in the same position FOREVER and NOT learn new skills anyways? NOT ME! Chris also interviewed for and snagged a really great job on Friday too! Things have been so great recently.
I have really come to embrace the “less-is-more” attitude lately. I don’t want to dye my hair or change who I am anymore. I am happy with what I have and vow to live simply from now on. Life is about more than acquiring material possessions, life is about living. That is also why this blog will always come second to anything else I am doing in my life. Maybe third or fourth sometimes. My internet identity is only a very small fraction of who and what I am. There is more to life than being behind the computer although I cherish having a place to share the delicious foods that I enjoy in my life from day to day.
*SIGH* Well, now that I have that off my mind I have a sinfully delicious chocolate chip waffles recipe that is nowhere near healthy! I made these when Chris’s brother and girlfriend were down for the week (last week?) and they LOVED them, and were filled for hours! I had to pull out and dust off the waffle iron for this batch of waffles as it hasn’t been used in probably 6 or 7 months (for some reason..) and it was so worth it!

Yummy Chocolate Chip waffles
- 2 cup unbleached flour
- 2 tablespoon sugar
- 3 egg whites
- 4 tablespoons oil
- 2 cup skim milk
- Dash of pure vanilla extract
- Ground cinnamon and fresh nutmeg to taste
- 1 teaspoon salt.
- Milk chocolate chips to taste
- Sift together flour, sugar, baking powder, salt, cinnamon and nutmeg. In separate bowl mix together egg whites, milk. oil and extract.
- Stir flour mixture into egg mixture, batter should remain slightly lumpy and bumpy. Fold in chocolate chips.
- Heat and lightly grease waffle BOTH SIDES of iron and spoon 1/4 cup of mixture onto each area in waffle iron (or however much you need for waffle iron).
- Cook for 5-7 minutes or until when top side of waffle iron lifted separates from waffles.
- Enjoy with a great big glass of skim milk.
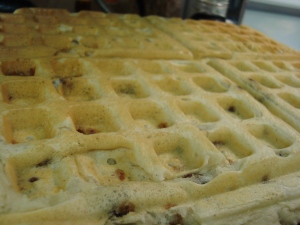
Yummy Chocolate Chip waffles
15 Apr 2010
by chefashley
in Appetizer, Info
Tags: Beans, Canned Beans, Dried Vs. Canned, Driend Beans
Which are best?
I personally think that using dried beans is the best route to go in any circumstance. They are cheaper to start with, and they don’t contain the extremely high sodium levels that most canned products have. And there are always concerns of certain canned products in general. Check out the Canadian Food Inspection Agency website often to stay up to date on any food recalls that occur. And there is always the concern of just trying to eliminate as many processed foods from our diet as possible! This is just another small way to add healthier options to your everyday diet 🙂
AND since I make so much hummus and chili (and just because beans are such a great addition to any diet) I keep dried red kidney and garbanzo beans in the cupboard at all times. I use the ‘PC Brand Blue Choice Menu” beans and haven never had a problem with these products!
The only downside to this product is that you really have to plan when you are using them in advance because they need to be soaked prior to cooking.
There are typically two ways that you can soak your beans.
1. Quick Hot Water Soak:
For every 1 cup of beans add 3 cups of water and boil for 2 minutes. Remove from heat. cover and let stand for 1 hour. Drain the soaking water and rinse with cold water.
2. Overnight Cold Water Soak:
For every 1 cup of beans add 3 cups of water and let stand for 12 hours or overnight in the refrigerator.
Basic cooking instructions:
Bring beans and clean water to a boil and and cook at a simmer for 60-90 minutes until tender. Add 1 teaspoon vegetable oil to the cooking water to reduce foaming. Add any salt and acidic ingredients (tomatoes, vinegar) after beans are fully cooked.
Yield: 1 cup dried beans equals approximately 2 1/2 – 3 cup of cooked beans. SO MANY BEANS!!!
I do keep a few cans of ready-to-use beans in the cupboard for when I am short on time, but totally recommend the dried beans for any other occasion.
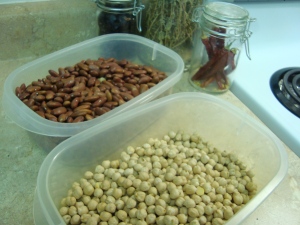
Dried Red Kidney and Garbanzo beans
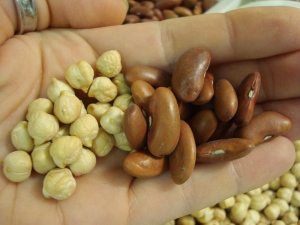
Closer look at the dried beans, they are hard as rocks!
14 Apr 2010
by chefashley
in Appetizer, Baked, Cheese, Dinner, Potato
Tags: Bacon, Baked, Cheese, Half and Half, Ham, Onions, Potatoes, Scalloped Potatoes
I whipped these up on the spot for Easter dinner when I remembered I hadn’t prepared a potato dish yet (whoops). They were SO GOOD and disappeared instantly from the table. A couple days after Easter when we had all that leftover ham I made this again and layered in pieces of meat for a more filling version that we ate for our main course! I will definitely be making this again!
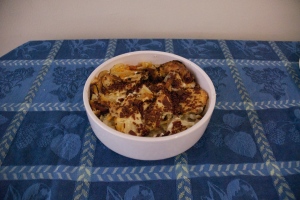
Potatoes before they disappeared 😛
Bacon and Cheesy Scalloped Potatoes
- 2-3 medium potatoes cut into thin discs
- 1 medium to large onion cut into thin discs
- 1/2 cup shredded cheese
- 4-6 pieces chicken bacon, chopped
- 2-3 tablespoons butter
- 3-4 tablespoons flour
- 1/2 cup half and half
- 1/4 cup skim milk
- Salt, pepper garlic powder and oregano to taste
- Cook bacon whichever way you prefer best. Pat dry and chop into small pieces.
- Grease a 9X9 inch glass baking dish and preheat oven to 375 degrees. Line the bottom of the dish with potatoes slices and top with onion slices, sprinkle with a bit of the shredded cheese (If using meat layer in after the potatoes). Repeat layers until you are out of potatoes, onions and cheese.
- In a frying pan melt butter. Add spices and flour and mix until smooth. Add half and half and increase heat until mixture is thick. Remove from heat and spread mixture over potatoes, onions and cheese. Pour skim milk evenly over potatoes and top with crumbled bacon.
- Cook in preheated oven for 50-60 minutes and enjoy!
14 Apr 2010
by chefashley
in Appetizer, Cheese, Dinner, Ingredient Substitution, Peroges, Perogies
Tags: Bacon, Cheese, Delicious, Perogies, Potato, Potato Bacon & Cheese Perogies
I LOVE perogies. I love to sautee onions in butter and fry the perogies in the same pan. DELICIOUS! I usually buy them from the grocery store though and they usually aren’t that great. Chris used to live near a bunch of Polish bakeries and one thing we used to pick up sometimes were freshly made perogies. They are 100% better than anything you can find in a grocery store.
SO after countless bags of half rate perogies I decided to whip up a batch of my own. BEST EVER!!! The dough was AMAZING, and the potato/bacon stuffing was better than any I’ve ever tried because it was FRESH! I started with a recipe I got from AllRecipes.com, my favourite website for recipes. I changed it up a bit to accommodate ingredients I had and they turned out great!
I don’t know if I’ll be able to go back to the ‘other kind’ now 😛 ALSO, this is QUITE the process and if you plan on making a lot I would recommend getting a few people together to produce a perogie making line. It would cut down on time and potential frustration 🙂
Cheese, Potato & Bacon Perogies
- 2 1/4 cups unbleached flour
- 1.5 teaspoons salt
- 1.5 tablespoons melted butter
- 1 cup plain yogurt (no fat)
- 2 egg whites
- 1 tablespoon canola oil
- 4 medium potatoes, peeled and cubed
- 3-4 pieces chicken bacon, chopped into small pieces
- 1/2 cup shredded cheese
- 1 tablespoon Parmesan cheese
- A splash of skim milk
- Salt, Pepper, Garlic Powder and a lil’ Onion salt to taste. Or whatever spices you like
- In a large bowl, stir together the flour and salt. In a separate bowl, whisk together the butter, yogurt, egg whites and oil. Stir the wet ingredients into the flour until well blended. Cover the bowl with a towel, and let stand for 15 to 20 minutes.
- Cook bacon using your preferred method and pat dry. Cut into very small pieces.
- Place potatoes into a pot, and fill with enough water to cover. Bring to a boil, and cook until tender, about 15 minutes. Drain, and mash with shredded cheese and Parmesan cheese with a little milk while still hot. Season with onion salt, salt and pepper and garlic powder. Set aside to cool.
- Roll out dough on a lightly floured surface until it is thin enough to work with, but not too thin so that it tears. Cut into circles using a cookie cutter, perogie cutter, or a glass. Brush a little water around the edges of the circles, and spoon some filling into the center. Fold the circles over into half-circles, and press to seal the edges. Place perogies on a parchment lined cookie sheet, and freeze. Once frozen, transfer to freezer storage bags or containers.
- To cook perogies: Remove desired amount of perogies into a highsided bowl. Fill with HOT tap water. In a frying pan heat butter or oil and sautee onions. When onions are half done use a slotted spoon and remove perogies from water and insert into hot pan with onions. Cook until golden brown on first side, flip and continue to cook until golden brown on second side. Enjoy immdeiately!!
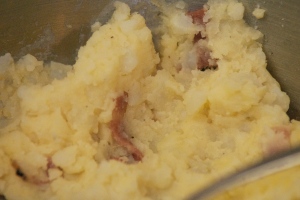
Cheese, Potato and Bacon Mixture

FINISHED PEROGIES!

Hours later and I have 34 perogies! You can tell the ones Chris did 😛
I like my perogies with a Sweet and Spicy sauce that you can pick up at most grocery stores!! They are also good with plain sour cream, yogurt (healthy alternative to sour cream) or some barbecue sauce.
14 Apr 2010
by chefashley
in Appetizer, Chicken, Dinner, Slow Cooker
Tags: Carrots, Celery, Chicken, Chicken Stew, ClubHouse, Onions, Potatoes, Slow Cooked, Slowcooked, Slowcooker, Stew
Was feeling VERY lazy Sunday after our Early morning walk with the pup and didn’t feel like cooking dinner at all! I looked in the cupboard and to my great surprise we had a ClubHouse brand Slow Cookers Beef Stew seasoning package… I don’t buy stuff like this ever because I just spice my food according to my own tastes, but this package appealed to my Sunday lazyness, so I grabbed it and went from there. I didn’t know if I would ever feel like using something prepackaged like that again so I took that as a sign that lazy stew was meant to be for that night 😛 . I ended up adding a whole bunch of others spices (as I suggest you do as well) because I didn’t think what came in the package was cutting it. I also needed to add some cornstarch mixed with a little water to thicken it up a little, as I like my stews to be quite thick!
So first off I didn’t have any stewing beef so I used Chicken instead. This is a great healthier alternative and it tasked great too! I cooked it on high in my huge slow cooker for about 3 1/3 hours and just couldn’t wait any longer as it SMELLED SO GOOD!!! So, it was kind of Slow Cooked. Feel free to reduce temp. and cook for longer if you plan on putting it on before work to enjoy for dinner that evening! I fed this to Chris’ brother and girlfriend last night (who are staying at our place for a few days) and they loved it even 3 days after it was made, which to me is a sign of an awesome recipe! if you want leave out the prepackaged ingredients and double up on the spices listed below and add chicken or vegetable broth instead of water.
Sorta SlowCooked Lazy Sunday Chicken Stew
Feeds 6. Great as leftovers!!!
- 2 Chicken Breasts cut into 1 inch or so cubes
- 3 carrots coarsely chopped
- 3 celery stalks coarsely chopped
- 1-2 medium onions coarsely diced
- 2-3 medium potatoes coarsely diced
- 1/2 fresh or frozen peas
- 1 package ClubHouse Slow Cooker Beef stew
- 2 cups water
- Oregano, Basil, Salt and Pepper, Red Pepper Flakes, Garlic Powder, Rosemary to taste
- Flour or cornstarch to thicken
- Put the first 5 ingredients into your slow cooker. Mix ClubHouse package with water and other spices if using. Pour mixture over Chicken and Veggies.
- Cook on high for 3-4 hours, or on low for 7-8 hours.
- Add peas during last 30 mins.
- If not thick enjoy for your tastes, add flour or cornstarch to water and then mix into hot stew. Stir well (cornstarch has TWICE the thickening capacity of flour so be careful!)
- Enjoy immediately or keep refrigerated 5-7 days.

Lazy Sunday SlowCooker Chicken Stew
14 Apr 2010
by chefashley
in Uncategorized
Tags: Recycle, Reduce, Reuse
I love when companies do stuff like this! I think it is such a great idea to get people into the habit of bringing a reusable mug by offering free coffee to those that do every once in a while. I absolutely love places that offer a slight discount when you bring in a reusable mug as well. It is so easy to do and you are making such a big difference to the environment by doing so!
Check out Starbucks Free Coffee Day facebook link here.
I haven’t really got into how much I REDUCE, REUSE and RECYCLE on my blog yet but I really should. One of absolute favorite stores EVER is….WAIT FOR IT…VALUE VILLAGE!!! I am so in love with giving items that may have ended up in a landfill a new home by not being judgmental of where they came from 🙂 SO many times I have gone in there and picked up items that were brand new, still in their packaging, for less than 50% of their original price. I got a lot of nifty tupperware containers, and cool glass dishware from there for $1 and $2 each! I have also been able to pick up some cool games for $3 and many hardcover books for 10% of the cover price. Most recently I found the coolest black, button up sweater dress from Le Chateau with the original $69.99 tag, for only $6.99. What a steal, and it fit PERFECT!
I like to do what I can even if it’s only small.
I often notice a lot of trash outside and try to pick up at least one piece while I’m out walking Hendrix! Sometimes if I notice any paper that people have littered I try and use that to pick up Hendrix’s “outsides”. We DO use biodegradeable doggy bags at all other times, but this really accomplishes two tasks in one! I, OF COURSE, come in and wash my hands IMMEDIATELY. That’s a given.
Another thing to remember is to rinse your recyclable items. A lot of products can’t be recycled if they have stuck on goo, so it’s easiest for us to take a second and do it as soon as we are done with the product.
ANOTHER tip if you shop at Loblaws/ Superstore: If you bring your OWN reusable bags they deduct .05 cents for each bag you bring off your bill! It may not seem like a lot, but bringing reusable bags is great for the environment and SO EASY to do! Just don’t forget them in your car 😉
DO you know of any companies that offer discounts like I’ve mentioned above? Leave a comment and share your knowledge 🙂
14 Apr 2010
by chefashley
in Appetizer, Bagel, Baked, Breakfast, Cheese, Chips, Dips, roasted garlic
Tags: Bagel, Bagel Chips, Chips, Extra Virgin olive Oil, oven baked
I hate to see anything go to waste so I was quick to act with the last almost-hard-as-rock everything bagel we had lingering in the fridge!
These bagel chips are so easy to make and very similar to something you would pay $3 or $4 dollars a bag for at the grocery store! And the beauty of making them at home is that you have a variety of flavors at your fingertips! Plus, you can control the amount of oil that goes into them if you make them yourself which is really important to me 🙂
You can either cut them from top to bottom to produce about 15-20 smaller chips per bagel, or from side to produce 7-10 larger chips.
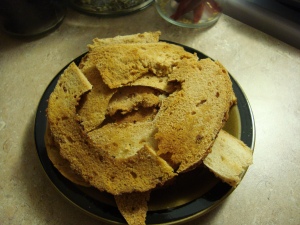
Oven baked bagel chips
Bagel Chips
- Bagels, whatever flavour you want
- EV Olive Oil, butter (I used leftover garlic oil from when I roasted garlic YUMM!)
- Flavours if you want them: dill, garlic, rosemary, Parmesan cheese, sesame seeds, poppy seeds, cinnamon and brown sugar or whatever you like best 🙂
- Preheat oven to 325 degrees and line baking sheet with parchment paper.
- Cut bagels to produce small or large chips and lightly coat with oil, butter.
- Add flavours of your choice and place on baking sheet in a single layer. Prepare in batches if necessary!
- Cook for 7-8 minutes or until golden brown.
- They are a nice solid chip so enjoy with hummus or another thick dip!
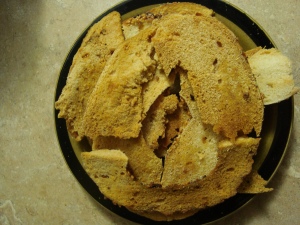
Oven baked bagel chips
13 Apr 2010
by chefashley
in Appetizer, banana, Breakfast, Desserts, Ingredient Substitution, pancakes, Peanut Butter, Vanilla
Tags: Banana Pancakes, Egg Substitution, ground flax seed, Healthy, Healthy Pancakes, Oil Substitution, sugar, Vanilla, WHole Wheat
Now THAT’S a mouth full.
Literally AND Figuratively.
On a lovely walk with Hendrix Sunday morning Christopher and I found an amazing little place called “The Apple Market”. This place had great, locally grown produce, as well as a garden center and general grocery store area! So many local products like soups, salad dressings and syrups, some I had never seen before like Cherry and Apple!!! I found a pineapple so large that I needed to carry it with two hands for only $2.99, as well as GIANT organic Bananas for .99 cents a pound!!! This awesome market is open Monday through Sunday (unlike your typical market) and is right around the corner so I think I will try and buy my produce from here only from now on.
SO that is where I scooped up the bananas for these delicious and filling pancakes which Chris had asked for the night before. I couldn’t BELIEVE how filling they were, and so easy to make 🙂 Try them with the peanut butter syrup I whipped up 🙂

Healthy Homemade Banana Pancakes with fresh fruit and peanut butter syrup!
Healthy Whole Wheat Flax Seed Banana Pancakes
- 1/2 cup whole wheat flour
- 1/2 cup unbleached flour
- 1 tablespoon sugar
- 1 tablespoon ground flax seed mixed with 3 tablespoons water, let stand 5 minutes
- 2 teaspoon baking powder
- 2 tablespoons apple sauce
- 1 cup skim milk
- Dash of pure vanilla extract
- Ground cinnamon and fresh nutmeg to taste
- 1/2 teaspoon salt.
- 2 ripe bananas mashed
OPTIONALS
- Extra 1/4 ground flax seed
- Toasted almonds or walnuts
- 1/4 milk chocolate chips
- Sift together flour, sugar, baking powder, salt, cinnamon and nutmeg and any extra ground flax seed you are using. In separate bowl mix together ground flax seed mixture, milk. apple sauce, bananas and extract.
- Stir flour mixture into banana mixture, batter should remain slightly lumpy and bumpy. If you are using any extras like chocolate chips or toasted nuts mix in until just incorporated at this point.
- Heat lightly oiled frying pans and spoon 1/4 cup out for each pancake. Cook on first side until you see air bubbles on top of pancakes, flip and cook until golden brown on other side.
- Enjoy with cut up fruit, or this delicious peanut butter syrup I made, recipe below.
NOTE: If you like thinner pancakes add more milk, thicker, add less!!!
Peanut Butter Syrup
- 1/4 cup smooth peanut butter
- 1/4 cup brown sugar
- 1/4 cup water
- dash of pure vanilla extract
- dash of maple extract
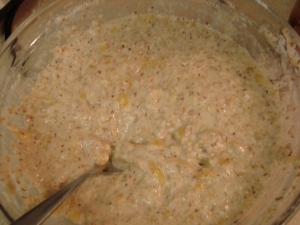
Thick whole wheat lumpy, bumpy banana batter
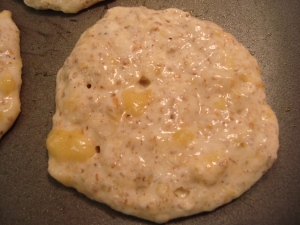
Almost ready to be flipped!
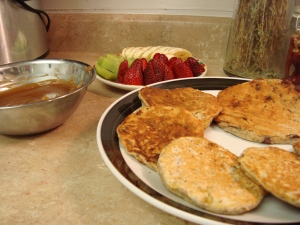
Healthy Banana Pancakes with fresh fruit topping and peanut butter syrup, ready to be enjoyed 🙂
09 Apr 2010
by chefashley
in Appetizer, Baked, Desserts, Phyllo
Tags: cream filling, Phyllo, phyllo eclairs, powdered sugar, sugar, Vanilla
Came across this lovely recipe completely by accident and so very happy that I did! I’ve never used a recipe from this site before but this turned out really, really well!!!
Not only did I get to use the two egg yolks that I had left over from a previous recipe, but I made one of the yummiest treats I’ve had in a while! This totally seams like something that you would pay an arm and a leg for at a fancy bakery, but it was so easy to make and the ingredients weren’t expensive either! AND Chris could NOT stop raving about them. I like that. I like that a lot.

Delicious Phyllo Eclairs
Phyllo Eclairs
For 3 eclairs…
SHELLS
- 2 sheets phyllo dough at around room temp.
- 1-2 tablespoons white sugar
- melted butter or cooking spray
VANILLA CREAM
- 4 tablespoons white sugar
- 1/8 cup cornstarch
- Dash of salt
- 2 egg yolks
- 1/2 cup skim milk
- 1/4 cup half-and-half
- 1/2 teaspoon vanilla extract
OPTIONALS
- 1/8 cup melted milk chocolate for drizzling
- Powdered sugar for sprinkling
To Make Shells
- Preheat oven to 375 degrees. Cut out 3 (12 x 6-inch) pieces of aluminum foil. Using index fingers as a guide, loosely roll up each foil piece jelly-roll fashion to form a cylinder with a 1-inch opening. Lightly coat outside of each cylinder with melted butter or cooking spray.
- Place 1 phyllo sheet on a large cutting board or work surface and be sure to cover your remaining dough to prevent drying!!! Lightly coat with butter or cooking spray. Sprinkle evenly with granulated sugar. Repeat layers once. Cut phyllo stack lengthwise into 3 equal strips.
- Place foil tube at bottom of each strip of phyllo and roll up jelly roll style and place on parchment lined baking sheet.
- Bake at 375 for 10 minutes or until lightly browned. Cool on wire rack and store (if not using right away) in an airtight container.
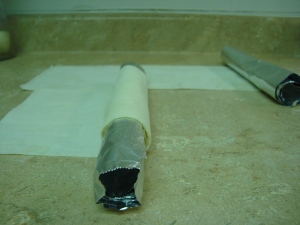
Rolling up the phyllo sheets

Shells before they hit the oven

Shells fresh out of the oven
TO MAKE VANILLA CREAM
- Combine first 4 ingredients in a small saucepan, stirring with a whisk until well blended. Gradually add milk and half-and-half, continuing to stir with a whisk. Cook over medium heat until mixtures comes to a boil, still stirring constantly. Reduce heat to low and cook for 1 minute, STIRRING CONSTANTLY.
- Remove from heat and stir in vanilla.
- If not using right away transfer to a ziploc bag and refrigerate.
- To pipe mixture into shells cut edge of ziploc bag and squeeze mixture into phyllo shells. If desired, drizzle with melted milk chocolate chips and sprinkle with powdered sugar!
09 Apr 2010
by chefashley
in Appetizer, Cookies, Egg
Tags: almond extract, Cookies, egg whites, Meringue, meringue cookies, sugar, vanilla extract
These cookies were so light, fluffy and delicious…and my dad was quite shocked when he picked one up and it was as light as air. I haven’t had these delicious cookies in such a long time that I decided to whip up a batch to enjoy with EASTER DINNER. They were so extremely easy to make and disappeared just as quickly as I put them out!
I absolutely love meringue even though it’s primarily sugar and stiffly beaten egg whites. I’m not a huge fan of waste though so I saved my two egg yolks and used them for Phyllo Eclairs, which Chris went on and on about (recipe to come).
Portion your batter and add a few drops of different food coloring and create a festive treat. Pinks, blues and purples for spring, red and green for Christmas, or just red for Valentines day.
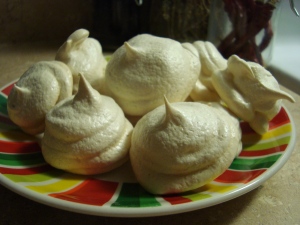
Delicious meringue cookies
- 2 egg whites
- 1 teaspoon white vinegar
- Dash of salt
- 1/2 teaspoon pure almond extract
- 1/2 teaspoon pure vanilla extract (the recipe called for clear vanilla extract but c’mon, I’m not going to search for and buy it for this ONE recipe)
- 1/2 cup granulated white sugar, or superfine sugar
- Preheat oven to 250 degrees. Line baking sheet with parchment paper.
- Separate egg whites into a bowl and reserve yolks for use in a different recipe.
- Pour in vinegar and salt and using a hand held mixer on high speed beat until mixture is foamy and doubled in size.
- Add extracts and sugar 1 tbsp at a time until stiff peaks form when you lift beaters from bowl.
- Bake for 50 minutes or until they become crisp and golden brown.
- Store in an airtight container.
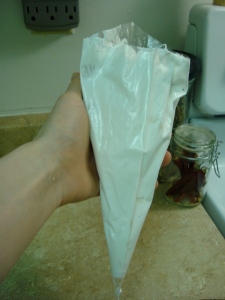
Pipe cookies onto baking sheet lined with parchment

Meringue cookie before it hits the oven
These cookies remind me of Christmas during a simpler time, a time when I didn’t have trays and trays of baked goods to bake and prepare, but rather to enjoy!
Previous Older Entries


